Parquet Wood Block Flooring Repairs, Fitting Tips, Advice and Hints
© Copyright Author Gary Hughes/Woodfloor-Renovations
>> You need our express prior permission to use/amend text from this Article <<
How to Lay or Repair Reclaimed or Replacement Parquet Wood Block Flooring in the correct way with the right products and methods is a job many DIYers just don't know how to do, it can be messy, very fiddly and time consuming, and has many different elements involved, but if done properly the repairs can make a huge aesthetic difference to the overall look of your project.
Doing the parquet block floor repairs to a high standard isn't as difficult as one may think, with the right Tools and professional products and methodology, the job can be done properly and can make the repaired area sound and ready for use.
First of all the loose parquet blocks need to be uplifted and set aside, if there are non full blocks ie.small triangles and angle cuts, it is a good idea to mark/number the blocks and to draw a legend of the area so when you re-instate the blocks the angle cuts go back in exactly the same place they came up from, it's also a good idea to take digital photo's of the area to make the parquet block floor laying process as easy as possible for yourself.
Printing off the pictures so you have a good visual reference isn't a bad idea either.
When the loose blocks are uplifted and the sub floor soundly scraped and vacuumed, you can move on to the next stage of the process, this involves the messy scraping and preparation work, this is an essential part of the process as the more preparation work you put in at this stage the better the overall finish will be.
Have a look at our Parquet Block Repair Case Study page by clicking this link
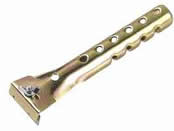 Linbide Tungsten Scraper
 |
The picture to the left of this text is a Linbide Tungsten Scraper, and is just superb at scraping bitumen residues from the bottom/sides/ends of Parquet blocks, B & Q sell an equivalent product for around the £10.00-£12.00 mark.
There is no automated easy way of doing this particular element of the job i'm afraid, its messy and creates bitumen dust, takes time but needs to be done, don't take more than 20-30 seconds per block, after you have done about a dozen of them you will get the hang of it and speed up. You don't have to scrape off every bit of bitumen residue, just the worst of it.
This process creates a lot of bitumen dust and residue's so have plenty of ventilation available and sweep/vacuum up on a regular basis to keep the dust down, ALWAYS wear a DUST MASK ,GLOVES & GOGGLES
Hold the block at one end with the other end butting against the floor, with the scraper laid flat against the bitumen surface push away and then back towards you until most of the residue is removed, then give the butt joints [sides & ends] a quick scrape as well to remove any nibs or spots of bitumen.
Scraping the butt joints will help when you are re-laying the cleaned blocks in that they will butt up against each other much better and leave less gaps overall.
|

Lecol PU280 Express Primer
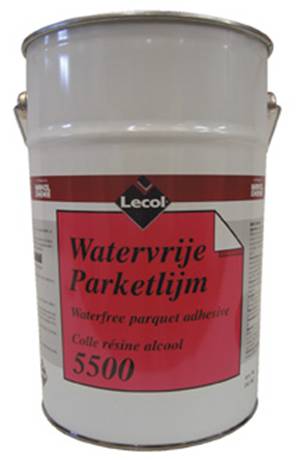
Lecol 5500 Parquet Flooring Adhesive
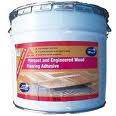
Sika 5500s Parquet Flooring Adhesive
|
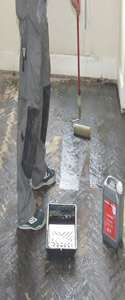
The next part of the operation is quite easy and should be done without any problems at all. After the voided area [sub floor] has been properly scraped and thoroughly vacuumed then the liquid DPM can be applied.
In this case the product we recommend is Lecol/Wakol PU280 Express Primer , which we have used extensively on our own repair projects, this really is a great product, very easy to apply, dries in 45-60 minutes and also acts as an adhesion promoter between the sub floor and the adhesive.
We recommend using DPM / Adhesive products from the same manufacturers, as one will have been designed to be used in conjunction with the other, using products from the same company will very likely negate any chance of the block repairs failing.
For optimum results, it is recommended that a minimum of 2 coats of the liquid DPM be applied to the subfloor, and that after the second coat, [is still wet] a broadcasting of Kiln Dried Sand / Sharp Sand be applied to the area, Vacuum thoroughly to remove the excess sand when the area is properly dry.
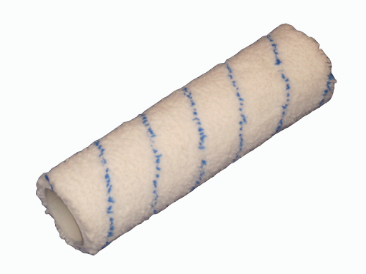
If the area to be coated is small, say up to 1m2 then I would say use an old clean paintbrush, between 2"-4" wide would be fine, then pour an amount of the product onto the voided area [say half a cup full] then work it around the area using the amount needed for proper coverage. For larger areas use a paint tray and roller for better product control.
Don't be shy with applying the product but at the same time don't pour too much out either, as it would take a lot longer to dry.
Drying time should be between 45-60 min's for a properly applied coat of Lecol/Wakol PU280 liquid moisture barrier. For larger areas use a 9" roller cage with a cheap medium pile roller, and use the paintbrush for cutting in. Make sure the area is touch dry before moving onto the next stage. Throw away the paintbrush or roller refill you have used to apply the PU280, because in an hours time they will be as hard as nails and completely unusable. |
Now comes the really messy part, well for most of us anyway.
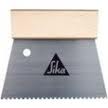
There are 2 ways of doing this part of the operation, for small areas you can apply the adhesive directly to the back of the blocks and then lay them, or, if the area you are working on is much larger, you can pour the Wakol/Lecol 5500 adhesive directly onto the prepared sub floor area and then spread it out as necessary using the correct sized notched trowel.
This type of adhesive/glue is thick and treacle like in consistency and if you are not careful can get/stick everywhere, have a pack of wipes handy just in case, and don't forget to use the Vinyl gloves !! |
|
When you are Fitting the Parquet Blocks I normally find its better to do 1 row at a time rather than go off at all angles, slide the blocks together and tap/knock into position if they need a little persuading.
Expect gaps! its not ideal but in reality even after a good scrape the blocks will not butt together like they did when they were brand new, some will but most of them won't, don't knock them together too hard either as you can easily move larger areas of blocks, throwing the pattern out and making things difficult for yourself further along the line.
It's quite common that when you are near finishing the area you are repairing, that the last few blocks just won't fit. This has happened to me many times and can sometimes be expected. This is where a nice sharp chisel or chop saw comes in handy to cut the tongue off the block or trim off excess material as necessary to help the block or blocks fit back into place.
Gaps of 1-6mm will fill nicely with Filler - See our Gap Filling Page for more details.
If you have followed the instructions above then the repairs are completed - hurrah - now all you have to do is wait at least 24 hrs for the area to properly dry and set before Sanding & Sealing your floor.
Don't presume you will end up with a perfectly flat repaired area, high and low spots over the repaired area are a very common occurance, expect the area to need more sanding off, to properly flatten the room/area out.
The Fitting of Parquet Flooring To Floorboards
This is a question i've been directly asked several times lately with regards to fitting parquet blocks directly over floorboards...
The direct answer to this question is: You CANNOT fit parquet wood block flooring directly onto floorboards...the area will need plying out with a good quality plywood which preferably needs to be a minimum of 15mm thick, 18mm is better again, use a good quality construction grade plywood.
Why ? i hear you ask...the answer is quite simple, floorboards will flex and move, and in all likelyhood will not be as flat as is needed, and if the blocks are fitted directly on top of the boards, then they [the blocks] will flex and move as well, meaning in a short period of time your parquet floor will likely fail.
Remember !! When fixing the plywood with screws, the correct British Standard for this is a screw EVERY 4 inches, and a screw EVERY 2 inches around the perimeter of the room, now this may sound excessive but if you do things properly then you will only be doing things once.
Check around the room for loose or squeaky floorboards, if you find any screw them down securely before fitting the plywood.
Thanks for reading, we hope this article helps you with your project - Regards Gary
*NEW FEATURE* Have a quick look at a new feature we are incorporating into some of our pages, click on the link below to view one of our Video picture Slide shows, which are hosted on our Youtube channel, this particular slide show is just under 3 minutes in length and shows off many of our parquet block repair pictures in the 'before & after' condition.
Parquet Block Flooring Repairs Before and After Pictures *NEW FEATURE*[click link to view gallery]
The opinions and views expressed in this article are those of Woodfloor-Renovations through our experiences with the numerous parquet block repair projects that we have undertaken.
** No guarantee whatsoever is offered with this advice **
REMEMBER - ALWAYS follow the manufacturers instructions and read them carefully.
If you are not sure about any aspect of this article consult a Professional.

Woodfloor-Renovations is a  recommended company, you can find us on Bona's Find your contractor page on their website recommended company, you can find us on Bona's Find your contractor page on their website |
The links below are Product Technical information sheets from the Manufacturers and should be of use. They are all PDF Files and clicking on the links will open your computers PDF reading program.
|
|
|
|
|
|
|
|
|
|
|
|
|
|
|
|
|
|
|
|
|
|

'We are Professionally Trained and Qualified Tradesmen'
|
SEO | Business Directory
|
|
|